
My first fly looked like something a cat coughed up. I’d ordered a starter kit, watched half a YouTube video, and lashed forty wraps of black thread into a lump the size of a pencil eraser, somewhere in the vague neighborhood of a hook. I was going to call it a Woolly Bugger. The trout, had any seen it, would have called the authorities. I still have it in a film canister on my bench, and here’s the thing nobody told me at the time: that ugly first fly is not a sign you can’t tie. It’s the entry fee. Everyone pays it.
So let me save you a little of the flailing I did. This isn’t a “buy 40 things and watch 90 hours of video” guide. It’s the honest version — what you actually need to sit down, the handful of patterns worth learning first, the techniques those patterns secretly teach you, and a straight answer on how long until your flies stop embarrassing you. I’ve been at the vise a long time now, long enough to tie my own confidence bugs for the South Platte. I also remember being genuinely terrible at it, which makes me a better guide here than someone who was born good.
The short answer
To start tying flies you need a small bench of tools — a vise (a budget rotary in the $50–$80 range is plenty), a ceramic-tube bobbin, fine scissors, a whip-finish tool, a threader, and a bodkin — plus thread and materials for one pattern, which runs roughly $80 to $150 secondhand or in a decent kit. Learn four patterns in this order — Zebra Midge, Walt’s Worm, Pheasant Tail Nymph, Woolly Bugger — and plan on your first dozen being rough, the second dozen fishable, and things genuinely clicking around fifty flies of the same pattern.
The savings myth is the worst reason to start — everything below is the honest version.
Is it even worth tying your own flies?
Honestly? For the money, no. For everything else, absolutely yes. If your only goal is cheap flies, tying will betray you — between the vise, the tools, and the materials, you’ll spend more in year one than you’d spend buying flies for five. The savings myth is the worst reason to start.
The real reasons are better. You tie the exact fly you want — the size, the color, the hot-spot tag that matches your home water on a stained day. You can sit down in February and build a season’s worth of bugs while it snows. And there’s a specific, slightly dorky joy in pulling a trout to hand on something you made at the kitchen table. I could afford to buy every fly I fish. I tie them anyway — not because I’m cheap, but because the fly came from my bench, and that matters to me.
There’s also a quieter benefit: tying makes you a better fisher. When you’ve built a Pheasant Tail from a few fibers and a strand of wire, you understand what it’s imitating and how it should drift in a way you never did when it was just a thing in a bin. The vise teaches the river.
How much does a beginner fly-tying setup cost?
A starter bench — vise, bobbin, scissors, whip-finish tool, and materials for one pattern — runs roughly $80 to $150 secondhand or in a decent kit. The real cost is time, not money. The one place I’d put your dollars is the vise, and even there a budget rotary in the $50–$80 range teaches you everything. A $200-plus vise like a Renzetti is nicer to use but in no way required — buying one before you’ve tied a fly is exactly the gear spiral that strands beginners.
What do you actually need to start tying flies?
A vise, a bobbin, a pair of scissors, a whip-finish tool, some thread, and the materials for one or two patterns. That’s the whole list to catch a fish on your own fly. Everything past that is comfort and capability, not necessity — you can add it as you go.
Here’s the starter bench, in priority order, with what each thing actually does:
- Vise — the clamp that holds the hook. A vise that won’t hold a hook securely turns every fly into a wrestling match, so buy one with a true, hardened jaw that locks down on a small hook and doesn’t let it pivot. A solid rotary vise (one that spins the hook on its axis) makes learning dramatically easier — you can wrap materials and inspect the far side without re-clamping. I run a Renzetti Traveler 2200 at my bench and it’s a joy, but you can learn on something much cheaper, and so should you.
- Bobbin — the little spool-holder with a tube that the thread runs through. It does two jobs: it feeds thread smoothly and, when you let it hang, its weight keeps tension on the wraps so they don’t unravel. Get one with a ceramic tube — a cheap metal tube develops a burr that quietly saws through your thread at the worst possible moment (ask me how I learned).
- Scissors — small, fine-tipped, sharp. You’ll cut thread, trim materials, and snip tiny tags an inch from your fingertips, so the points matter. One good pair beats three bad ones.
- Whip-finish tool — the gadget that ties off the thread with a series of trapped wraps so your fly doesn’t come apart on the first fish. You can learn to whip-finish by hand (and you should, eventually), but a tool gets you a clean, durable knot from day one.
- Bobbin threader — a wisp of wire that pulls thread through the bobbin tube. A buck, saves your sanity.
- Bodkin — a needle on a handle, for picking out dubbing and clearing cement from the hook eye. A sewing needle in a cork works in a pinch.
- Head cement or UV resin — to lock the finishing wraps. A small bottle lasts years.

That’s it — a handful of tools that, secondhand or in a decent starter kit, won’t break you. Buy the basics, tie a dozen ugly ones, then decide what you actually want to upgrade.
Thread, hooks, and beads — the literacy that unlocks everything
Before the patterns, three quick pieces of vocabulary, because almost everything you’ll read assumes you already know them.
Thread is sized two confusing ways. The old “aught” scale (6/0, 8/0 — more zeros means finer) was never standardized, so one brand’s 8/0 can be heavier than another’s. The honest number is denier, an actual measure of mass: 70 denier (about 8/0) is fine for small dries and midges, #16 and down; 140 denier (about 6/0) is the everyday workhorse for general nymphs and dries, roughly #10–#16. A spool of black 70-denier and a spool of 140 covers nearly everything you’ll tie to start. Bonus: spinning the bobbin one way flattens the thread into a smooth ribbon (less bulk), the other way twists it into a tight cord (stronger, for biting wraps) — a trick that instantly makes your bodies cleaner.
Hooks are a style code, not a size. The model number (a TMC 100, a Fulling Mill jig) tells you the style — dry, nymph, scud, streamer; the ”#” on the box (#16, #18) tells you the size, and bigger numbers mean smaller hooks. For South Platte nymphs you’ll live in the #16–#20 range. The big thing to know early: a jig hook has the eye bent up so that, paired with a slotted bead, the fly rides hook-point-up and snags the bottom far less.
Beads add weight and a trigger. A tungsten bead is nearly twice as dense as a brass one, so it sinks a small fly fast without making it bulky — the whole game on a tailwater. A slotted tungsten bead is shaped to seat on a jig hook. Match the bead to the hook gap (roughly 2.0–2.5 mm for #18–#16) and don’t overthink it past that. I broke down the full hook-and-bead logic in my South Platte tying essentials post if you want to go deeper.
The handful of techniques every fly secretly teaches
Here’s the reframe that made tying click for me, stolen from the teachers who do this for a living: you’re not learning patterns, you’re learning a few transferable moves. Master these five and you can tie most of the box.
- Starting the thread. Lay the thread against itself on the bare hook and trap the tag under three or four wraps — no knot needed, the wraps lock it. A thin, clean start is the foundation of a thin, clean everything.
- The pinch wrap. Trapping a material against the top of the hook so it doesn’t spin to the far side when you cinch down. This is the foundational move — tails, wings, and bodies all start here.
- Dubbing. Twisting a sparse pinch of fur or synthetic onto the thread, rolling it in one direction only, then wrapping it on to build a body. The universal beginner sin is using three times too much. Less is always more — you can add, you can’t subtract.
- Ribbing. Wrapping a fine wire up the body in open spirals for segmentation, and to armor the fly against trout teeth.
- The whip finish. Tying off the thread so the fly survives. Learn it with the tool first, by hand when you’re ready. I walked through both ways to whip-finish here — it’s the one knot worth obsessing over.
Notice that a Zebra Midge is really just start the thread, wrap a body, rib it, whip finish. A Pheasant Tail adds a tail and a thorax. Each new pattern is the last one plus one move — which is exactly why the patterns below are in the order they’re in.
The first patterns worth learning (and what each one teaches)
Start with simple, durable, fish-catching flies — not the showpiece dries you see on Instagram. The goal in your first month isn’t a perfect fly; it’s reps that build proportion and thread control. These four, in this order, do exactly that.
1. Zebra Midge — your first fish on your own fly
The simplest effective fly there is, and not coincidentally one of the most productive on the South Platte. A bead, a thread body, a fine wire rib. That’s the entire recipe.
- Hook: jig or standard nymph, #18–#20.
- Bead: small tungsten (black or silver).
- Body: black thread, wrapped slim.
- Rib: fine silver or copper wire, counter-wrapped in open spirals.
It teaches bead seating, a clean thread body, and ribbing — and it catches fish the day you tie it. My own version runs a black tungsten bead and a bright orange tag at the tail for stained water; I broke down that Zebra Midge variant here. Tie a dozen. They’ll get noticeably better by number eight.
2. Walt’s Worm — the lesson that sparse and buggy beats fancy
Walt Young’s Pennsylvania pattern is almost insultingly simple: hare’s-ear-type dubbing on a weighted hook, no tail, no wing, no nonsense. And it flat catches fish. This is your dubbing tutorial — learn to twist a sparse, tight, tapered body and you’ve unlocked half the nymph box. The “Sexy Walt’s” adds a tungsten bead and a hot-spot collar once you’re ready to fancy it up.
3. Pheasant Tail Nymph — tails, bodies, and a thorax
Frank Sawyer’s classic, and the first fly that teaches real proportion. A few pheasant-tail fibers form the tail and get wrapped forward for the body; a copper wire rib locks it; a built-up thorax suggests the wing pads. Now you’re measuring against the hook — tail about a shank length, body two-thirds of the shank, room left at the front. Proportion is the quiet skill that separates a fly that looks alive from one that looks like it’s wearing a costume.
4. Woolly Bugger — movement, and your first “big” fly
The most-tied streamer in the world, and a great confidence builder because it’s forgiving at a larger size. A marabou tail that breathes, a chenille body, and a saddle hackle palmered up the body for pulsing legs. It teaches you palmering (wrapping a feather up a body) and tying in soft materials — and it’s just fun to tie something bigger than a #20 after a month of squinting at midges.
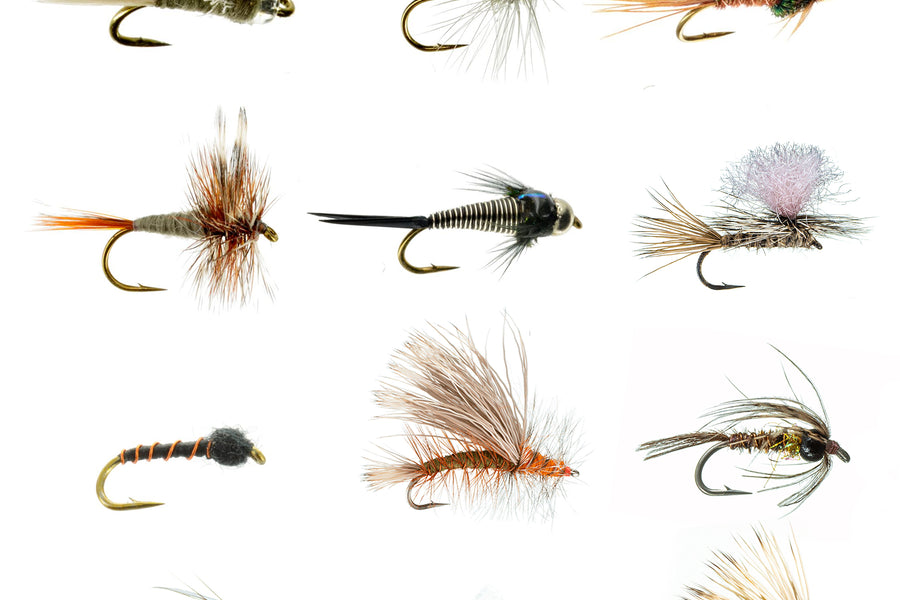
Notice what’s not on this list: delicate Catskill dries, parachute posts, anything with split tails and microfibbets. Those are wonderful and you’ll get there — but they demand proportion and hackle control you won’t have yet, and trying them first is the fastest way to get frustrated and quit. Earn them. Once these four feel automatic, a Frenchie or a Blowtorch — my own confidence point fly, tied with an orange tag for stained water and a green tag for clear — is just a hot-spot collar away.
How long until my flies stop looking terrible?
Plan on your first dozen being rough, your second dozen being “fishable,” and somewhere around fifty flies of the same pattern things genuinely clicking. Repetition of one pattern beats dabbling across ten. The hands learn by doing the same move over and over until it stops being a thought.
A few honest expectations:
- Your first flies will be lumpy and crowded at the eye. Crowding the hook eye is the universal beginner fault — you run out of room and bury the eye in thread. The fix is mechanical: leave an eye-and-a-half of bare shank at the front before you start, and tie backward from there.
- You’ll use too much of everything. Too much dubbing, too much flash, too long a tail. Sparse flies move better and look more natural. When in doubt, use half.
- You’ll lose a few to unraveling. That’s a whip-finish problem or a too-thick head. Two thin coats of head cement beat one gummy glob.
The trout, mercifully, do not grade on aesthetics. A slightly ugly fly with the right size, the right profile, and a drag-free drift will out-fish a gorgeous one fished badly every single day. Your “bad” flies will catch fish long before you think they’re ready.
Do I need to take a class or can I learn from YouTube?
You can absolutely learn from video — that’s how most of us did it — but tying alongside one good teacher beats jumping between fifty. Pick a teacher whose pace and voice you like (Tim Cammisa’s teaching-first approach is the gold standard for beginners), and tie with them, pausing the video, rather than watching three patterns and then trying to remember. A local fly shop’s tying night is even better: somebody can look at your fly and tell you the one thing you’re doing wrong, which a video can’t.
The other accelerant is tying a pattern you actually fish. When you can drift your own Zebra Midge through a Deckers run and watch the indicator dip, the feedback loop closes and the whole thing gets addictive in a hurry.
A realistic first-week plan
If you want a concrete on-ramp, here’s the whole curriculum:
- Buy the basics — vise, ceramic bobbin, fine scissors, whip-finish tool, threader, bodkin, head cement.
- Buy materials for ONE pattern — Zebra Midge: #18 jig hooks, small tungsten beads, black thread, fine silver wire.
- Tie that one pattern a dozen times. Don’t switch. Watch the lumps shrink.
- Add Walt’s Worm the next week, then the Pheasant Tail.
- Fish them. Nothing teaches faster than watching your own fly get eaten.
Five tools, one pattern, a lot of reps, then go fishing.
My take
Start small, start cheap, and start ugly. The single biggest mistake new tyers make isn’t buying the wrong vise or using the wrong thread — it’s trying to tie a perfect parachute Adams on day one, getting humbled, and shelving the whole thing. Tie a dozen scruffy Zebra Midges instead. Catch a fish on one. That fish rewires your brain, and suddenly you’re the person with a film canister of bad first flies on the bench, grinning about it years later.
It’s worth it. Not for the money — never for the money — but for the quiet hour at the vise in the dead of winter, and for the particular satisfaction of a trout eating something you built. That never gets old.
Next up: once you’ve got the basics down, learn the eight South Platte patterns worth tying, then nerd out on the materials that actually earn space on a bench — and if you want to see where this all ends up, here’s a full bench tour of a dialed-in setup.